A capo is a clamp that presses across all six strings at a specific fret, raising the pitch of every string by the same amount. It’s one of the most useful accessories a guitarist can own — and one of the most misunderstood.
Most players think of a capo as a shortcut to avoid barre chords. And it can do that. But a capo also lets you play in any key using the open chord shapes you already know, create richer alternate voicings, and even simulate alternate tunings without retuning your guitar.
If you’re new to capos, start with the video below. It covers the fundamentals: why you’d use one, how to place it properly, and the key-transposition logic that makes it all work.
How to Place a Capo Correctly
This is where a lot of beginners run into trouble. Place your capo just behind the fret wire — not on top of it and not too far back. If it sits too far from the fret, you’ll get buzzing. Too close or directly on the metal and the notes will sound dead or muffled.
Press down firmly and evenly. Then strum all six strings and listen — every string should ring clean. If one sounds off, adjust the position or the pressure. On acoustic guitars with wider necks, you sometimes need to angle the capo slightly to get even pressure across all the strings.
The Two Main Reasons to Use a Capo
Transposing means moving a song into a different key. Maybe the original key doesn’t suit your voice, or it’s full of difficult barre chords. A capo lets you play easy open shapes while sounding in that harder key. If you can count frets, you can figure out any capo position.
⚙ FREE TOOL
Need to transpose a song right now?
Our interactive tool does the math for you — pick the key, choose a capo fret, and see exactly which chord shapes to play. No charts to memorize.
Voicing means playing the same chords in a different position on the neck to get a different tone. Put a capo on the 5th fret and play G, C, D shapes — you’re actually in the key of C, but the sound is brighter, more chimey, with a mandolin-like quality. This is huge when two guitarists play together. One plays open, the other plays capoed, and the song fills out beautifully.
Choosing the Right Capo
Not all capos are the same. Spring tension, clamping style, and adjustability all affect your tuning and tone. A capo that grabs too tight will pull your strings sharp. One that’s too loose will buzz.
The three main types:
- Spring clamp capos (like a Kyser) — fast to apply with one hand. Great for live performance. Downside: you can’t adjust the clamping pressure, and some squeeze too hard.
- Screw/toggle capos (like a Shubb or G7th) — you control exactly how much pressure is applied. Better tuning stability. Takes a bit longer to put on.
- Partial capos (like the Spider Capo) — lets you capo individual strings instead of all six. Opens up alternate tuning sounds without actually retuning.
We’ve reviewed a few specific models:
- The Planet Waves Capo + Tuner — puts a tuner right on your capo. Handy for quick tuning checks after you clamp on.
- The Spider Capo — capo individual strings for some wild alternate-tuning sounds without actually retuning.
Creative Capo Tricks
Once you’ve got the basics down, a capo becomes a creative tool, not just a transposing shortcut.
- Partial Capo Tricks — capo only some of the strings and you get open-tuning textures while staying in standard tuning. Great for singer-songwriters looking for something different.
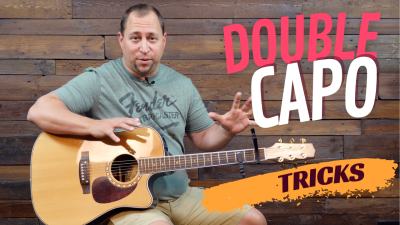
- Double Capo Tricks — use two capos at once to simulate drop tunings like Drop E or Drop F. Sounds unusual and really stands out in a mix.
Capo and Tuning
Here’s something that trips up a lot of players: putting a capo on changes your tuning slightly. Always check your tuning after you apply the capo and again after you remove it. The change in string tension can pull things sharp or flat depending on your guitar and the capo’s spring strength.
A screw-style capo (like a Shubb) gives you more control over clamping pressure, which helps with tuning stability. Spring-loaded capos are faster to use but can be less precise.
Common Capo Questions
Does a capo damage your guitar?
No. A properly used capo won’t damage your guitar. Just don’t leave it clamped on when you’re not playing — over time, constant pressure in one spot can leave a slight impression on the fretboard finish. Take it off when you’re done.
Where exactly should I place a capo on the fret?
Place it just behind the fret wire (toward the headstock side), not directly on top of the metal. This gives you clean notes without buzzing. If you hear buzzing, move it slightly closer to the fret wire.
Can you use a capo on an electric guitar?
Absolutely. A capo works on any guitar with frets — acoustic, electric, classical, bass. On electric guitar you’ll hear the pitch change more cleanly since there’s less acoustic resonance, but it works the same way.
What is the best type of capo for beginners?
A spring clamp capo (like a Kyser Quick-Change) is the easiest to start with — squeeze it with one hand and you’re done. As you get more serious about tuning accuracy, consider a screw-style capo like a Shubb or G7th.
Do I need to retune my guitar after putting on a capo?
Yes, always check your tuning after applying a capo. The extra pressure from the clamp can pull strings slightly sharp, especially with spring-loaded capos that squeeze harder than necessary.
Go Deeper
If you want the full picture — transposing in any key, choosing the right chord shapes for any song, stacking voicings for multi-guitar arrangements, and a printable quick-reference chart — check out our complete How to Use a Capo course.